SFTP
Who this is for:Organization admins
An SFTP data source connects to an SFTP server and pulls a file from it. Use this when your data is dropped onto a server on a schedule rather than uploaded by hand.
Before you start
Section titled “Before you start”- You need to be an organization administrator.
- SFTP isn’t enabled for every organization. If Flat File (SFTP) doesn’t appear as a data source type, it isn’t turned on for your organization — contact your administrator.
- Have your server details ready: host, port (usually 22), username, and either a password or an SSH private key.
Create an SFTP data source
Section titled “Create an SFTP data source”Step 1 — Name & Type
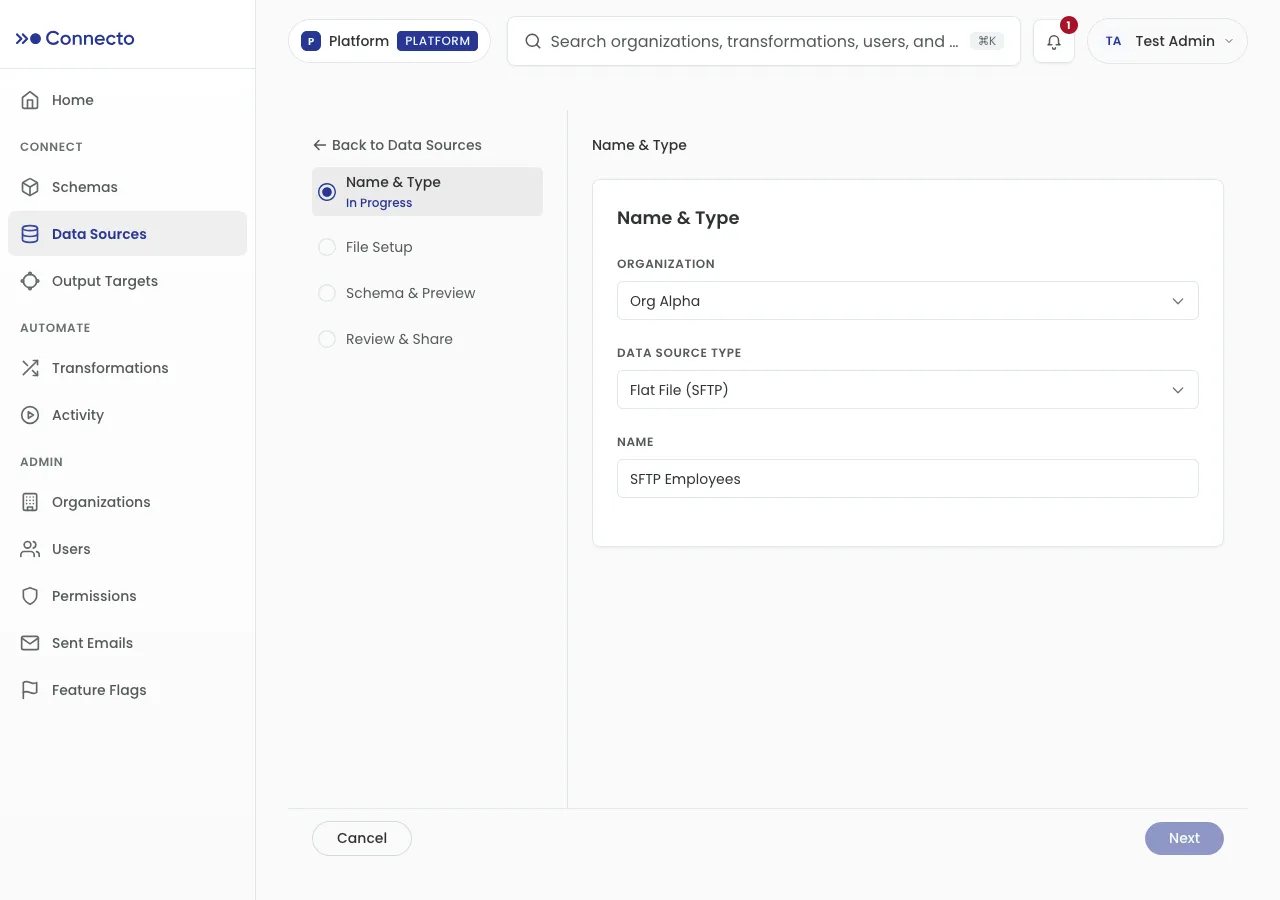
Section titled “Step 1 — Name & Type”- On the Data Sources page, select + New Data Source.
- Choose the Organization.
- Set Data Source Type to Flat File (SFTP).
- Enter a Name (for example, SFTP Employees).
- Select Next.
Step 2 — File Setup
Section titled “Step 2 — File Setup”Connect to the server
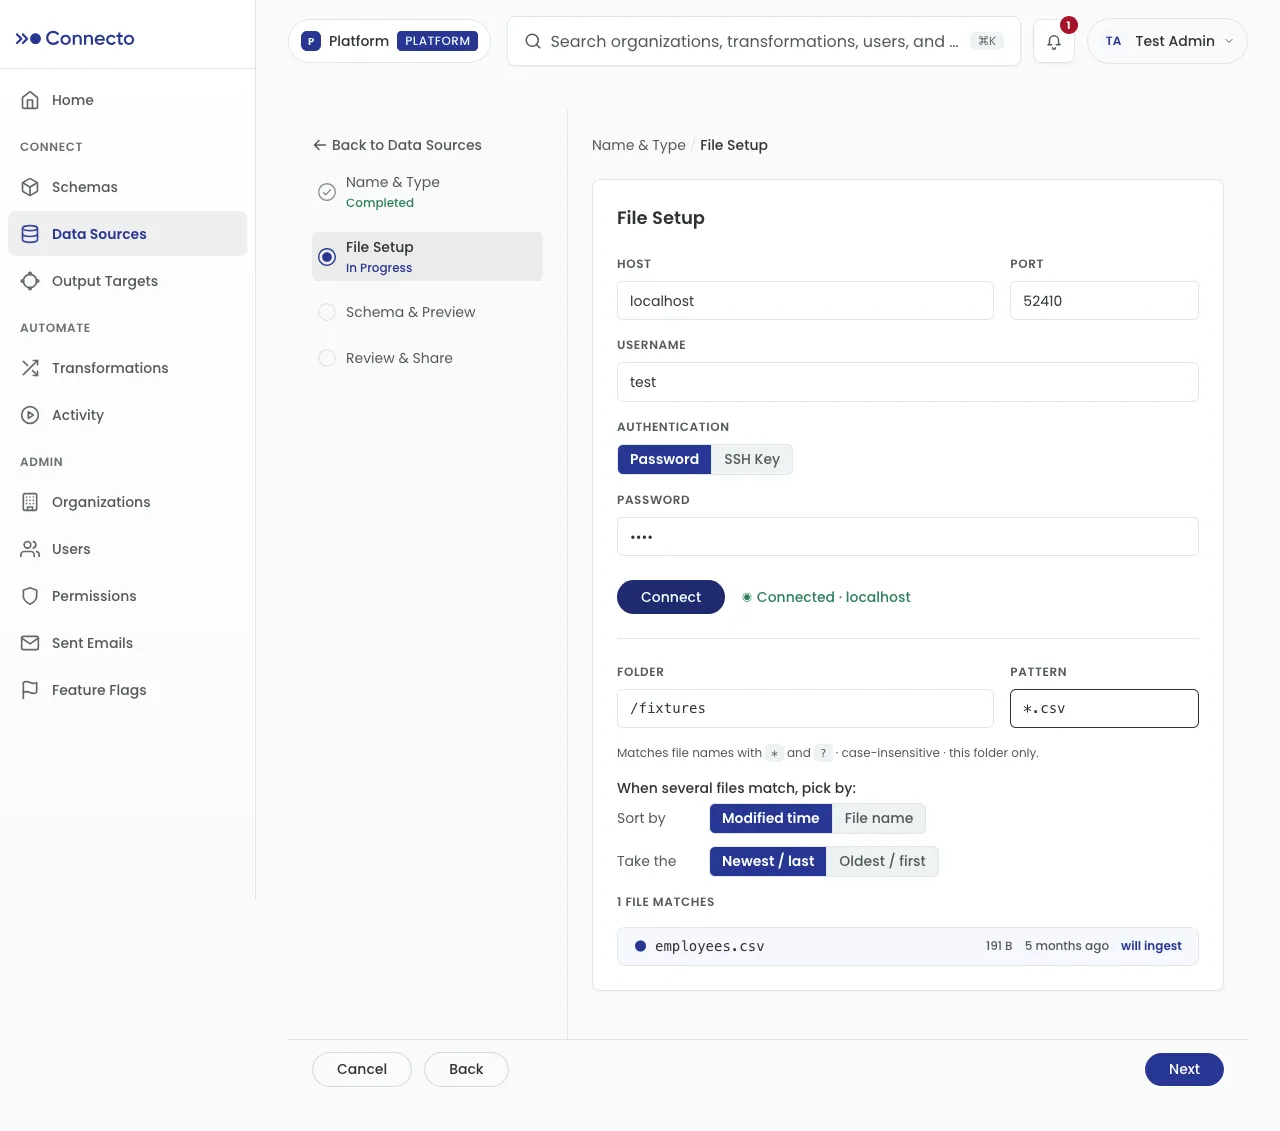
- Enter the Host (a domain or IP address, with no
https://or other prefix) and the Port (defaults to 22). - Enter the Username.
- Choose an Authentication method:
- Password — enter the account Password.
- SSH Key — paste your Private Key (or drop a key file), and add a Passphrase if your key has one. The key is sent securely when you connect and is never shown again.
- Select Connect. On success Connecto shows Connected ·
. If it fails, it shows the error so you can correct the details and try again.
Choose the file
Once connected, tell Connecto which file to pull:
- Set the Folder to look in (for example,
/exports/daily). - Set a Pattern to match file names (for example,
claims_*.csv). Patterns use*and?, are case-insensitive, and match only in that folder. - If several files match, use When several files match, pick by to choose the winner — Sort by Modified time or File name, and Take the Newest/last or Oldest/first.
Connecto lists the matching files and marks the one it will use with a will ingest badge. If nothing matches, adjust the folder or pattern.
- Select Next to pull that file into the source.
Steps 3 & 4 — Schema & Preview, then Review & Share
Section titled “Steps 3 & 4 — Schema & Preview, then Review & Share”These are the same as for an upload source: choose Infer from file or Use existing schema, review the preview, then on Review & Share select Create Data Source. See File uploads for the details.