File uploads
Who this is for:Organization admins
An upload data source uses a delimited file you upload from your computer — for example a CSV. This is the quickest way to get data into Connecto.
Before you start
Section titled “Before you start”- You need to be an organization administrator to create a data source.
- Your file must be one of these types:
.csv,.tsv,.txt,.dat, or.psv. - The file can be up to 100 MB.
Create an upload data source
Section titled “Create an upload data source”Step 1 — Name & Type
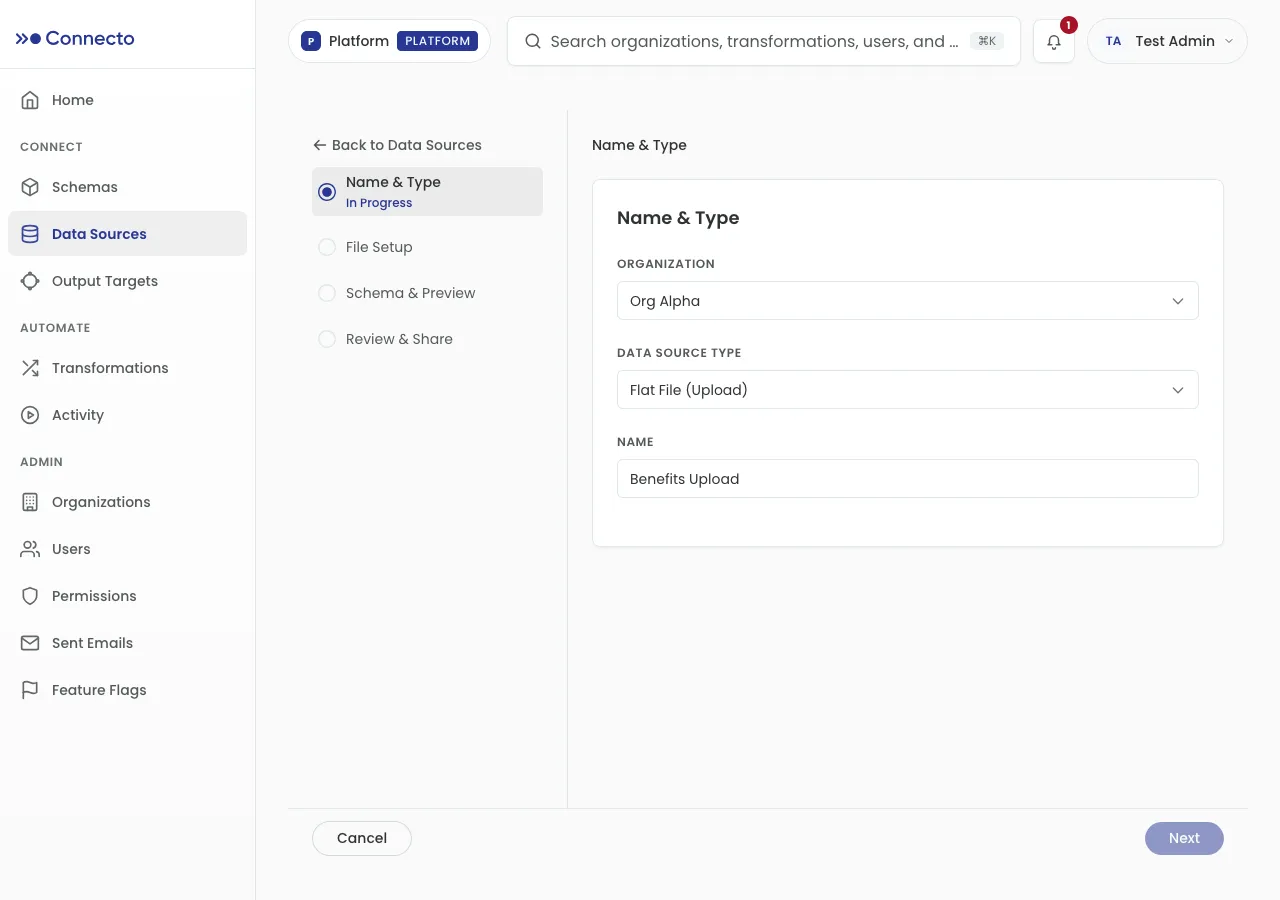
Section titled “Step 1 — Name & Type”- On the Data Sources page, select + New Data Source.
- Choose the Organization the source belongs to (skipped if you’re already inside an organization).
- Set Data Source Type to Flat File (Upload).
- Enter a Name (for example, Employee Data).
- Select Next.
Step 2 — File Setup
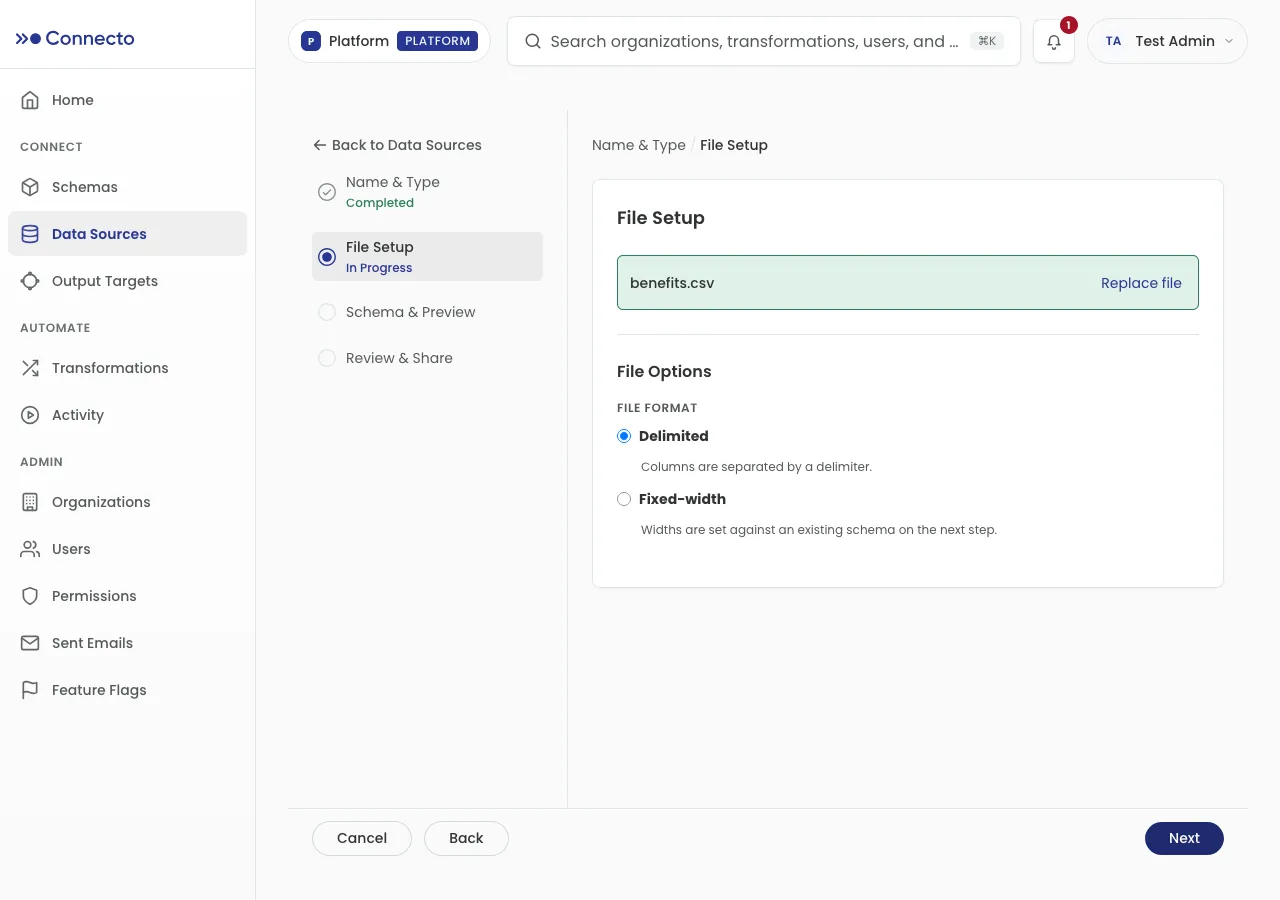
Section titled “Step 2 — File Setup”- Click to upload, or drag and drop your file onto the upload area.
- Connecto uploads the file and shows its name. Chose the wrong file? Select Replace file.
- Under File Options, set the File Format — Delimited (columns separated by a delimiter, the usual choice for CSVs) or Fixed-width — and adjust related options such as the delimiter and header row.
If you pick an unsupported file type or a file over 100 MB, Connecto tells you and asks for a different file.
Step 3 — Schema & Preview
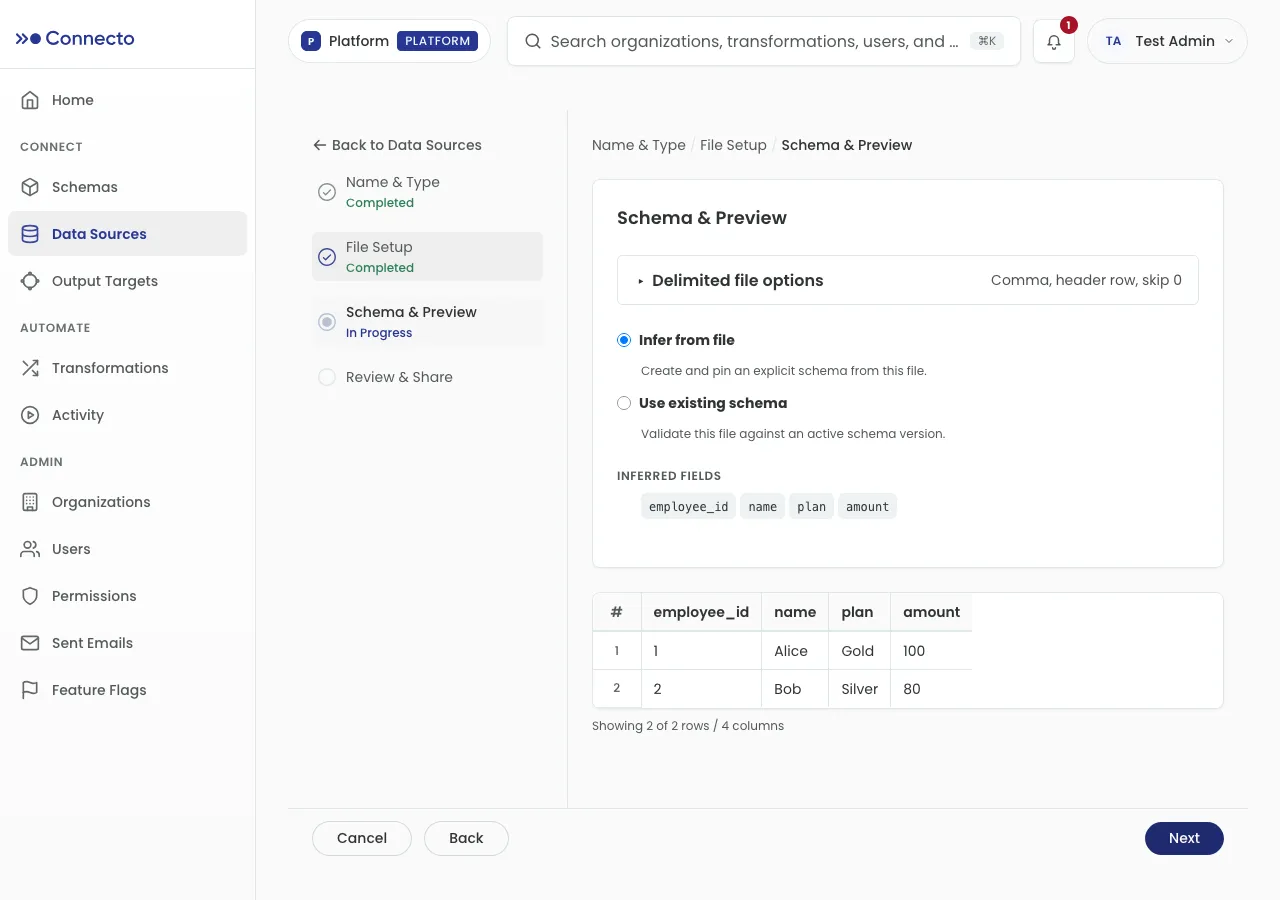
Section titled “Step 3 — Schema & Preview”Decide how Connecto should interpret your columns:
- Infer from file — Connecto reads the columns from this file and pins them as the source’s schema. Use this the first time you set up a source.
- Use existing schema — validate this file against a schema that already exists. Pick the Schema Version, and Connecto checks the file against it.
When validating against an existing schema, Connecto reports All rows pass validation, or lists any problems it found — missing expected columns, unexpected file columns, or specific row errors. Fix the file and re-upload if there are column problems; you can’t continue until the columns line up. A preview of your rows appears below.
Step 4 — Review & Share
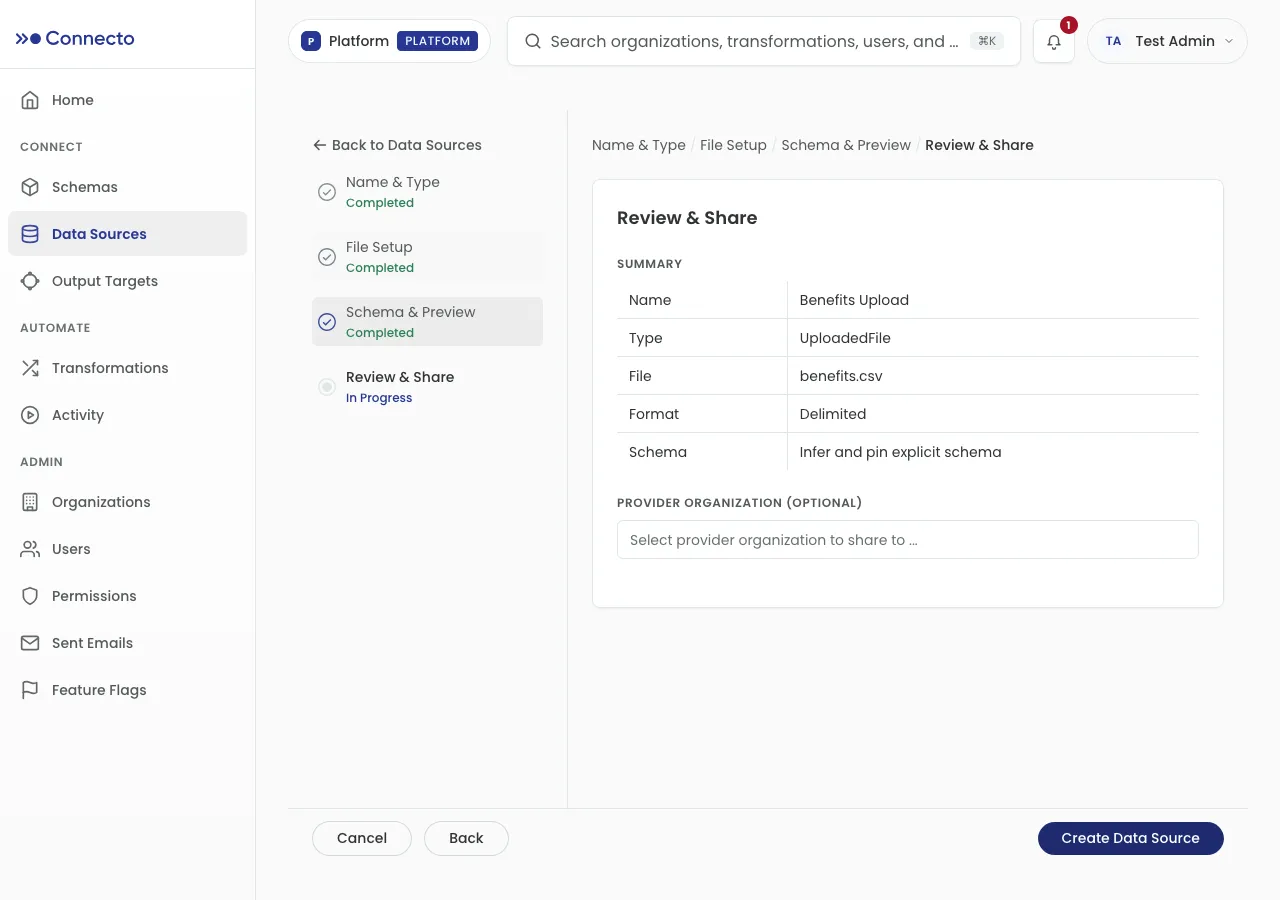
Section titled “Step 4 — Review & Share”- Check the Summary (name, type, file, format, and schema).
- Optionally choose a Provider Organization to share the source with.
- Select Create Data Source.
Connecto creates the source and opens its page.